How to prepare and how to care for gloxinia in the winter at home
This inhabitant of tropical latitudes is a perennial plant that needs winter rest in order to gain strength for the new flowering season. That is why it is very important to know when to remove gloxinia from the window and how to prepare it for wintering.
Storage conditions for gloxinia in winter
This tropical plant has 3 main growth stages: dormancy, active growth, and flowering. Rest for a flower is very important, since in its absence it ceases to bloom at all or blooms, but not plentifully. In order for the plant to winter properly, it needs to create certain conditions. However, these conditions depend on the storage method.

Regardless of the storage method of gloxinia in winter, the following conditions must be observed:
- lack of access to sunlight;
- temperature regime - within + 5 ... + 18 degrees;
- humidity - 60–90%.
Did you know? According to the language of flowers, which was introduced by the King of Sweden Charles II in the XYIII century, gloxinia meant "love at first sight."
How to prepare a plant for wintering
In the fall, when the plant begins to prepare for rest, and most often this happens in September or in the first half of October, the leaves begin to fade and gradually fade. It is during this period that it is necessary to begin preparations for the dormant period: we reduce the frequency of watering to a minimum (once every two weeks), and we also stop any growth stimulation (fertilizing in the first place). Roots die together with leaves. By mid-October, only the bulb that has formed during the summer remains from the flower. It must be further determined for storage, so that after wintering again admire the luxurious flower.

How to store gloxinia in winter at home
There are two ways to store gloxinia tubers: in a pot or outside the soil. The first method is the most common. For the florist, this method is notable for its simplicity, since the pot with prepared tubers from the window is moved to a cool and dark place. For this, the space under the bathroom, under the bed or any other is suitable. However, whatever place you choose, it is very important to monitor the humidity and temperature. The optimal temperature regime for such storage is from +16 to +18 degrees, and humidity should be 60–90%.
During the wintering period, the plant must be periodically watered (1-2 times in 30 days, depending on air humidity). This method is most often used for young plants, while significantly reducing the risk of flower drought. However, not everyone can find a suitable place to store gloxinia in a pot, especially if they have a large collection or bulky pots, so they choose a method of storage outside the ground.
Important! Gloxinia wet tuber is not recommended for storage, as the root system can rot.
For this, the bulb must be carefully removed from the soil:
- Take any large container, such as a basin or pan.
- Transfer the earth from a pot or planter into this container.
- After that, with careful movements, breaking the lumps of earth, free the gloxinia bulb from the earth and extra roots.
- When the tuber is cleaned, it must be washed under running water and dried.
After the bulb dries, it can be placed in a bag on moist peat soil or sand. The tuber is also sprinkled to hide it from exposure to light. For storage, river sand is more preferable, but before use it must first be washed, dried in the oven and moistened. Such actions will protect gloxinia from various harmful microorganisms or infections. Now the plant can be identified in a pre-selected location. With a large number of bulbs, they are placed at the bottom of the box in one row.

Bags with gloxinia are placed in a box and placed in a dark place with a temperature regime of +12 to +16 ºС. Gloxinia can also be stored in the refrigerator; for this, packets of tubers are placed in the vegetable compartment. However, it is necessary to set the temperature within + 11 ... + 12 ºС. In such conditions, gloxinia can take up to 3 months.
Did you know? It is possible to moisten the gloxinia soil during the rest period with the help of pieces of ice. With this method of hydration, the plant will continue to " sleep " and receive the necessary moisture.
Dormant care
During dormancy, gloxinia tubers should be watered periodically (1-2 times in 30 days, depending on ambient temperature and humidity). In this case, top dressing and additional lighting are not required. Twice a month, the tubers are checked for rot or sprouting. When the first shoots appear, it is better to trim them, especially if they appeared in December or January. Tubers can only be planted in early spring. However, this applies to the rest period of tubers, but we also consider what to do with a flower that has not gone into hibernation.

Thus, the daylight hours of the plant lasts for 14 hours. If this is not done in a timely manner, then the germ can be cut, but only if the tuber is strong enough (3 cm in diameter). Watering such plants is necessary in the same way as tubers, and they also do not need fertilizer, as this will become a kind of incentive for flower growth. If gloxinia does not want to "sleep", then you can cut off the adrenal part of the plant, and place the pot with the tuber in a dark place.
Important! It is necessary to begin to fertilize gloxinia at the end of the dormant period, while it is introduced only after moistening the soil, as this can cause burns to the root system.
Tuber Awakening
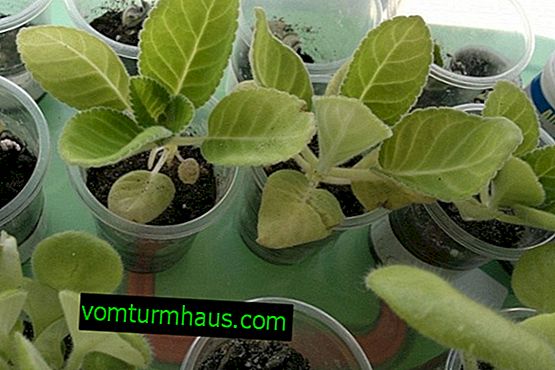
Tubers can wake up in February-March. Those bulbs where shoots have already appeared must be transplanted into a pot or pot with a nutrient substrate. When planting, the tuber is instilled in such a way that it is barely visible. Since gloxinia is a photophilous plant, it is placed in a well-lit place. If necessary, you can use a fluorescent lamp.

Extra shoots are best removed, and leave only a few strong shoots. Such thinning will protect the tuber from depletion. After all, the abundance of flowers depends on its size. Excess shoots can be used as seedlings. Such cuttings are instilled in any suitable container, covered with a glass and a plastic bag. Several holes are made over a kind of dome to avoid accumulation of excess moisture. Gradually, the plant begins to harden.
Important! Gloxinia has a very sensitive root system, so you need to fertilize after watering to avoid burns of the tuber.
Features after winter care
After the end of the wintering period, gloxinia begins the vegetation. After the first shoots have appeared, the plant is removed from the pot and the tubers are cleaned under running water. It will not be superfluous to hold the root system in a weak solution of potassium permanganate. This will be especially useful for those flowers in which rotting or rotting was observed during the winter; also carry out such an operation with those tubers that are transplanted for the first time.

In this issue, there are 3 stages:
- Before flowering, add nitrogen fertilizers, alternating it with a small amount of compounds containing potassium and phosphorus.
- During flowering, we reduce the proportion of nitrogen fertilizers and increase the proportion of phosphorus in the fertilizing. This will contribute to the growth of peduncles.
- After flowering, potassium should prevail in the nutrient composition to enable the tuber to stock up on nutrients.
Important! The part of the plant from which the young sprouts came from should remain above the surface to prevent their decay.
Sometimes a plant may not “wake up” in time after winter. One possible reason may be a very short rest period (less than 4 months). For example, during dry wintering, the root may dry out. In this case, you need to put the flower in the light and water in small doses. After a while, gloxinia will return to normal and begin to "wake up." Another reason may be the fact that a very young plant was placed for wintering, which did not have time to form a tuber by that time, or it rotted during the winter.

Did you know? According to scientific research by Thai scientists, keeping gloxinia at home is the best way to combat oxygen starvation.
A healthy root should have a slightly yellowish or pinkish tint. In this case, dry the incision and treat it with an antiseptic. Further gloxinia will take time to “wake up”. If the cut at the root is brown, then such a root will not be able to be revived. But if a brown hue is observed only on one side, then remove the completely rotten part and plant the tuber in a new soil. Such a plant can still be saved.
Video: planting gloxinia in the substrate
Additional tips
Experienced gardeners often give a series of tips for caring for gloxinia.
Here are some of them:
- Young growth is grown from seeds and is ready for wintering only in 5-6 months. If the seeds are planted late, the tuber may not have time to form. Such a flower can not be sent to winter. Otherwise, there is a risk of completely losing it, so in the winter it is enough to maintain the necessary humidity and light level so that the plant does not stretch.
- In order to determine whether a flower is ripe enough for wintering, you can simply count the number of leaves. Only the presence of at least 6 pairs indicates that the plant is ready.
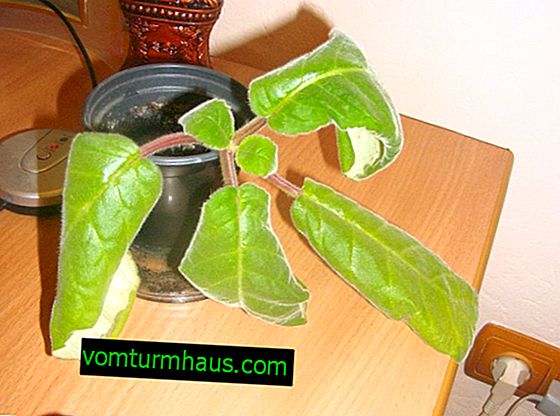
- Too much stretching of the shoots may indicate a lack of lighting, too high a temperature in the room, or oversaturation of gloxinia with nitrogen. To fix the problem, analyze the conditions in which the flower is located, and either add light to the room, or ventilate the rooms more often (but without drafts), or temporarily stop feeding with nitrogen fertilizers. Elongated shoots are preferably cut.
- Twisting the leaves at gloxinia may indicate that the room is too cold or the plant is being watered excessively. To eliminate the problem, carry out anti-pest treatment, just in case, check the room for drafts or low temperatures, and also analyze whether the watering is carried out in too large doses.
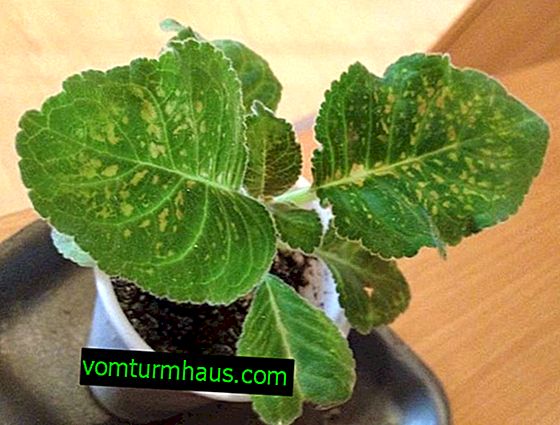
- The leaves of gloxinia may turn yellow with chlorosis, from a lack of nitrogen, or from excessive watering. If we already considered the third option, then chlorosis is caused by too hard water for irrigation. Use warm, settled moisture. To soften it, add a drop of lemon juice or vinegar. On the issue of nitrogen deficiency, one should analyze in what period of flowering the plant is. As described above in the article, the ratio of elements in fertilizers varies depending on the life cycle of the plant.
- If the leaves are discolored, this may indicate magnesium starvation. Use special liquid formulations that already contain all the necessary elements.
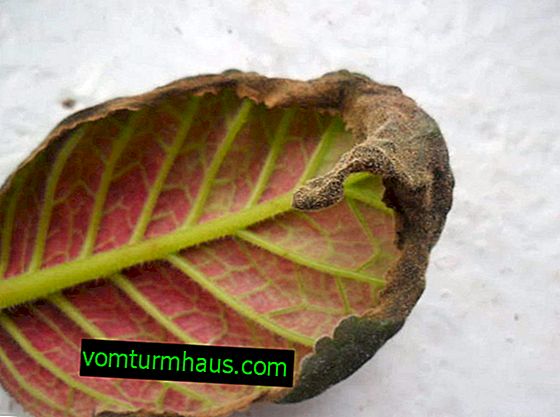
- When spots appear on the leaves, it is worthwhile to treat with insecticides. Although this can also indicate irrigation with too cold water, and an excessive level of lighting that causes burns to the plant.
- If the leaves at your gloxinia are red, then this indicates a lack of phosphorus. It also leads to the fact that the flower in general can stop growing. To eliminate the problem, feed the plant with superphosphate.
- To make gloxinia, which has faded, begin to bloom again, cut it to 2-3 pairs of leaflets. In one and a half or two months, a new stem will grow on the plant, and flowering will begin anew. You can speed up the process by adding a composition containing phosphorus and potassium.


Learn more about planting gloxinia and caring for it at home.
Gloxinia needs care and care, therefore, for abundant flowering, it must be properly prepared for the rest period. At this time, the plant needs regular, but sparse watering and minimal lighting. Subject to the basic rules of care in the winter, gloxinia will delight its owners with lush and long flowering.