How to make your apiary
Beekeeping is a rather expensive undertaking, and the first expense item that a beginner beekeeper inevitably faces is the acquisition of high-quality hives. However, if you try to build comfortable houses for bees with your own hands, using at least partially the materials already available, the costs can be significantly reduced. This review provides the basic rules for the creation of an apiary at home, as well as outlines the basic principles that must be followed in the process of such work.
Designing a private apiary - where to start
There are two main types of apiaries - stationary and mobile, so the first thing a novice beekeeper needs to do is determine whether his bees will collect pollen and nectar from a previously known site or whether they will be transported from place to place after the flowering of honey plants.

Important! The stationary content of bees makes it possible to remove on average no more than 30-50 kg of honey from one hive, while nomadic beekeeping provides an increase in this indicator many times even if no other methods of intensification by the beekeeper are used.
Beekeeping Site Requirements
Bees are unsafe insects. In certain circumstances, contact with them may be associated with a risk to health and even life, which should never be forgotten. Therefore, in order for the occupation of beekeeping not to bring troubles to the farmer with the law, it is important to know the standards for the placement of such objects in the area.

With some possible differences, these rules usually boil down to the following:
- The plot on which the apiary is located must belong to the farmer legally - ownership, lease, gratuitous use, etc.
- If it is planned to use a plot for a future apiary located on the territory of a summer cottage, horticultural, gardening partnership or other similar association, the constituent documents of such an organization may contain their own additional requirements and restrictions regarding such an opportunity, which should also be taken into account.
- The distance from the border of the land to the nearest hive should not be less than 10 m.
- It is mandatory to have a fence between the hives and neighboring areas, and such a fence can be either a standard fence or any other obstacle - a building, structure or even a hedge from a dense shrub. It is only important that the height of such a fence be at least 2 m.
- The minimum permissible distance between the apiary and the state highway should be 500 m, the same distance should separate the object from high-voltage power lines and railways.
- Any industrial facilities, including airfields, factories, military training grounds, television stations, should not be closer than 5 km from the site used for beekeeping.
- The owner is obliged to notify the local authorities about the placement of the apiary on their site, and those, in turn, must be informed by the state veterinary service (this rule applies if honey production is planned to be profitable as an entrepreneurial activity).
- In addition to hives, additional facilities should be provided on the territory of the apiary for storing equipment, empty frames filled with honey honeycombs, containers, means for pumping honey, disinfection, etc., and in regions with cold winters - special winter houses to ensure ventilation, temperatures in the range 0 ... + 6 ° C and a maximum permissible relative humidity of 85%.
Important! It is considered unconstructive to create apiaries for more than one and a half hundred bee colonies.
Criteria for choosing an apiary site
If compliance with the formal requirements for the site for the future apiary is necessary first of all to the farmer himself, then the bees present their own criteria for the place of their placement, and if they are not met, you can not dream of a good honey crop.

In order for beekeeping to be successful, it is important that the site meets at least four main parameters:
| Climatic conditions and landscape | An apiary should not be located in marshy areas, or in a too hot steppe zone or, on the contrary, purged by cold winds. In nature, bees live in the forest, so an orchard with good ventilation and constant partial shade is ideal for them. |
| The presence of honey plants | Plants suitable for collecting pollen and nectar with the subsequent production of honey from these products should be in sufficient quantity within a radius of no more than 2 km from the hives, and there should not be wide reservoirs between the house of the bees and the place of their hunting, the distance over which the insect will need to be to overcome with a heavy load of prey. The more blooming honey plants around the apiary in different periods of time, the greater the yield. |
| The absence of "false" honey plants | Confectioneries, sugar factories, catering establishments and other establishments that work with sweets switch the attention of bees to easier prey, which is absolutely not suitable for the production of high-quality honey. |
| Isolation from "competitors" | The presence of other apiaries within a radius of 2–5 km not only reduces pollen production, especially in conditions of lack of honey plants, but also leads to the risk of infection of insects by infectious diseases from “neighbors”. |
Mandatory preparatory work
After the site for creating a future apiary is selected, it must be properly prepared. First, the territory is leveled and cleared (not only garbage is removed, but also last year's foliage, weed grass, as well as stumps and other organic residues), then it is enclosed and a plan for the placement of objects is planned.
Important! According to generally accepted sanitary standards, the corpses of bees, as well as the garbage collected during apiary cleaning, are usually burned, so you need to take care of a special place in advance where you can carry out such work without violating fire safety rules.
As a hedge, it makes sense to use tall honey plants - fruit trees and berry bushes. This will allow, on the one hand, to save on building materials, and on the other - to provide bees with an additional source of nutrition. For sowing honey plants from the number of meadow annual and perennial grasses, it is also worth using the entire territory of the apiary, which remains free from structures and walkways. Best suited for this purpose: alfalfa, fireweed, clover, motherwort, colza, cornflowers, dandelions, sage, sweet peas, burdock, camel thorn.

Did you know? The American beekeeper Lorenzo Loren Langstrot is officially considered the inventor of the frame hive, although in reality this idea was first implemented at the beginning of the 20th century by the Ukrainian beekeeper Pyotr Ivanovich Prokopovich (Chernihiv province). Interestingly, almost simultaneously with the American, a similar decision to create a bee house was implemented by Jan Dzierzon (Poland) and August von Berlepsch (Germany).
Making modern beehives with your own hands
In the world there are many different designs of beehives that have replaced clay nests and hollows used for breeding bees by our distant ancestors, for example, hives such as:
- Dadanovsky (Dadan-Blatt hive) - a single-hull wooden structure designed for 12 frames;

- Rutovsky (Langstroth-Ruth hive) - a two-hull structure, where the buildings are periodically interchanged

- Alpine - a two-hulled structure created on the principle of a hollow in a tree;

- horned - a multi-hull house with a mesh bottom, where individual sections are located one above the other;

- Lounger - a device with the same principle, but the tiers in it are not located in the vertical, but in the horizontal plane;

- cassette - providing thin partitions between sections, allowing to separate the bees from each other and thus reduce the likelihood of spread of infections in the family.


Familiarity with the design
A frame beehive is a wooden base, similar to a box, but its lower and upper planes must be removable so that the beekeeper can clean the house, examine its inhabitants and pump out honey.
Important! The best hives are obtained from linden, aspen, willow or poplar. As for conifers, spruce, fir or cedar are acceptable here.
The internal structure of the structure assumes the presence of such elements:
- buildings or shops (they can be placed one on top of the other, then the lower ones will house the family itself and its offspring, and the upper bees are used to create honey reserves);
- transverse walls;
- covers;
- feeders;
- frames that are installed on special strips.
The external elements of the hive are letachi, flight boards and gate valves, the bottom is tightly joined with the hull, legs and a common roof with a mandatory slope for rainwater drainage (in order to protect the interior from getting wet, the roof is always made a little wider than the hull).

Did you know? The working day of an average bee lasts about 12 hours. At the same time, the insect is in flight for about an hour and spends only 15 minutes in the hive to relieve prey, and if the bee catches the night during the collection of pollen, it sleeps in the flower and only returns to the hive in the morning.
The frame is wooden battens fastened in the form of a rectangle, between which about four rows of wire are stretched for attaching waxes to them. The number of frames may vary depending on the overall size of the hive, but is usually not less than 8 and not more than 24 (a larger hive becomes too bulky, and a smaller one does not justify the cost of creating it).

Preparation of parts for the housing
The standard building material for making a frame hive is wood, preferably softwood. Such wood has low thermal conductivity and, in addition, does not change shape under the influence of moisture and direct sunlight.
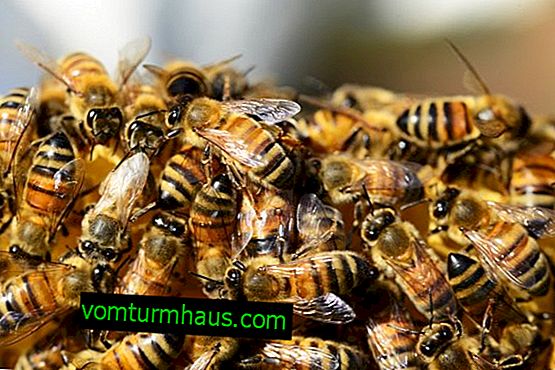
Did you know? So that the bees do not sting, they are fumigated with smoke. It turns out that smart insects respond to a “fire alarm” as if they need urgent evacuation, and not lightly, but with a supply of honey, which the bees pump into their goiter and in this state physically cannot bend to use the sting.
In relation to possible alternatives, including those that can significantly reduce the cost of construction, there are a number of important warnings:
| Beehive Material | disadvantages |
| Hardwood (birch, pine, etc.) | They are difficult to process, warp, crack, poorly retain heat, create conditions for frequent diseases and death of bees. |
| Fiberboard and other types of plywood | They require additional insulation. |
| Styrofoam or Styrofoam | They require additional weighting, otherwise the hives are unstable. |
| Polyurethane | It does not allow air to pass through well, and therefore requires equipping the hive with an additional ventilation system. |
Any work begins with a drawing. You can use ready-made projects to plan a future design yourself. Having a given number of frames of known standard sizes in the plan, knowing the thickness of the strips on which the frames will be installed, and also taking into account that the optimal distance between the frames in the case should be 0.8–1.0 cm, this is not at all difficult.

Important! The front walls of the hives are recommended to be painted in various colors, then the bees will not get lost, returning home with prey. Ideal colors for beehives - green, yellow, white and blue.
Armed with a jigsaw or hacksaw, from the prepared material should be cut:
- case walls - 4 pcs .;
- walls of stores - 4 pcs.;
- bottom;
- stand;
- armwort;
- a roof;
- arrival boards;
- handles for carrying.


How to collect a hive
After all the details have been prepared, they must be thoroughly polished so that neither the hive inhabitants nor the beekeeper himself get hurt by possible burrs on the tree. Then a letok is cut out in the front wall and a flight board is attached to it so that it is convenient for the bees to land. Handles, respectively, are attached to the side walls. Now it is necessary to make ventilation openings in the roof cover and, if the roof was conceived as a gable roof, fasten the two parts together. For fastening, you can use carpentry glue, liquid nails or self-tapping screws.
Learn more about the types of bee hives.
Now you can proceed with the assembly, strictly observing the following sequence of actions:
- Attach horizontal strips to the wall of the enclosure to install frames on them.
- Connect the walls around the perimeter.
- Attach the bottom of the housing. If the bottom is foreseen to be 5 cm wider than the hull area, then the additional distance located on the front side of the hive will play the role of an arrival board, which will greatly simplify the assembly process.
- Seal the gaps with a special putty for wood to prevent the appearance of wax moths.
- Install the socket housing on the bottom.
- Depending on the chosen design, place the next building, store or roof cover on top.
- Cover the insulation with a heater (a layer of foam or a pre-prepared mattress stuffed with dry grass, moss, sow thistle or reeds.
- To increase the tightness of the roof, cover the roof with a tin sheet and only then install it on the roof cover.
- If desired, attach a wooden stand to the bottom.
- Paint the finished beehive with oil paint.
- After the paint has completely dried and weathered, frames can be installed in the hive.
Video: hive assembly
Placing beehives in the apiary area
It is necessary to place the hives in the apiary in strict accordance with the originally planned scheme. Do not place houses directly on the ground (or grass), therefore, if stands were not provided for the manufacture of hives, they should be built on the spot. Выбор материала для этой цели не имеет принципиального значения, поэтому можно воспользоваться любыми подручными средствами — обрезками профилированной трубы, уголком либо другой альтернативой, важно, чтобы подставку можно было глубоко вдавить в землю и затем установить на ней улей абсолютно устойчиво.

Вам будет интересно узнать, как сделать своими руками или выбрать готовую пасеку на колесах.
Tips from experienced beekeepers
Для того чтобы идея разведения пчёл на собственном участке с максимальной вероятностью себя оправдала, начинающим пчеловодам следует воспользоваться практическими советами более опытных коллег. Вот некоторые из таких советов:
- Задумывая пасеку, необходимо иметь в виду, что в распоряжении её владельца всегда должны быть не только резервные рамки, но и запасные ульи, с таким расчётом, чтобы всегда можно было обеспечить жильём и дополнительной «работой» минимум 10–15% от запланированного числа пчелосемей.
- Разведение пчёл — абсолютно особая отрасль сельского хозяйства, подходит это занятие далеко не всем, поэтому начинать всегда нужно с небольшого проекта, рассчитанного всего на несколько ульев.
- Приобретая пчёл, следует заранее поинтересоваться их породой, поскольку именно она определяет степень адаптированности насекомого к заданным погодным условиям, производительность (количество создаваемого мёда), склонность к роению, плодовитость (скорость размножения) и прочие важные критерии, среди которых не последнюю роль играет характер насекомых и их склонность к агрессии (для начинающего пасечника это немаловажно). Для выращивания в средней полосе европейской части РФ больше всего подходят такие породы, как Среднерусская, Карпатская, Итальянская, Кавказская (жёлтая и серая горная), Краинская, Карника и Украинская степная.
- Устанавливать ульи необходимо в защищённом от прямых солнечных лучей месте, поскольку перегрев жилища изнутри приводит к резким потерям производительности пчелосемьи. Оптимальная температура внутри улья должна составлять +34, 0…+35, 5°С (наружные температурные показатели для этого должны быть минимум на 6 градусов ниже). При этом важно понимать, что пчёлы вполне приспособлены для того, чтобы переносить жару, однако для охлаждения воздуха они используют свои крылья в виде своеобразного веера, то есть вместо того, чтобы заниматься производства мёдом, «работают» над улучшением микроклимата в собственном доме.
- Для повышения показателей производства мёда пчелосемья должна быть защищена от шума.
- При изготовлении улья своими руками следует заранее подумать о том, чтобы утеплить конструкцию. В этом случае даже при использовании зимовника можно значительно сэкономить на обогреве помещения.
- Дополнительный обогрев улья зимой можно обеспечить, плотно уложив слой снега между нижней частью конструкции и землёй.
- Выбирая место для установки улья, всегда необходимо точно знать, где именно расположены основные насаждения медоносов, и внимательно следить за тем, чтобы человеческое жилище или площадка для отдыха не располагались между пасекой и такими насаждениями.
- Откачивать мёд нужно вовремя, в противном случае можно потерять более половины потенциального урожая.
- Работая с пчёлами, следует соблюдать абсолютное спокойствие, не делать резких движений, не шуметь и не отвлекаться. Утверждение о том, что пчёлы «узнают» своего хозяина и не жалят его, является мифом, в действительности единственной надёжной защитой от ядовитого жала является опыт, концентрация и, конечно, специальная одежда.