How to make a do-it-yourself pavilion for bees
The bee pavilion is designed to make rational use of space in the apiary. Such a construction allows you to install more hives, which in this case will occupy less space. You can purchase a ready-made pavilion, or you can design it yourself. About how to make such a design - later in the article.
Did you know? Since 2006, Europe and America have experienced a rapid decline in bee populations. This phenomenon is called the “ Colony Destruction Syndrome, ” and its nature has not been established. If everything continues to happen at this pace, then by 2035 the bees can disappear as a species.
Basic requirements for the bee pavilion
When constructing a pavilion for bees, a number of design requirements must be taken into account:
- Its dimensions should be such that it is convenient for a person to serve the bees.
- The passage between the rows of beehives should be at least 80 cm wide so that the honey separator can be easily transported.
- The pavilion must be built from high-quality and safe materials for bees.
- The design should be convenient for inspection and mobile, suitable for wintering bees.
- If the pavilion is stationary, then the thickness of its walls should be about 20-30 mm, if the cassette - 7 mm.
- The cassette type design must have additional stiffening ribs.

Design options
Pavilions for bees are stationary or mobile (cassette). The stationary pavilion is usually installed in one place and is used to save space and facilitate the wintering of insects. It consists of a supporting structure, usually metal, beehives and utility room. It is designed in such a way that it can be quickly turned into a mobile, if necessary. A mobile or cassette pavilion is a more common version of this design.
Important! The dimensions of the end sheets are indicated internal, for an already finished design, therefore, when marking the fiberboard under them, you need to add several millimeters on the sides that will correspond to the thickness of the fiberboard.
It allows you to quickly move the bees to the place of pollination. Typically, such pavilions are placed on truck trailers or made in the form of small vans on wheels. Outwardly, it resembles a chest of drawers, since each beehive is in an isolated cabinet, not connected with neighboring ones. This facilitates the process of keeping, care and wintering of bees. The dresser version of the structure allows you to perform all the manipulations with the hive to one person, without outside help.
How to independently build a pavilion for bees
If you are planning to make a pavilion yourself, you should first think over the dimensions of the structure, make a drawing, calculate and prepare materials, tools, and after that proceed with the construction. The experience of beekeepers in operating pavilions suggests that it is more profitable to make a cassette type of structure. Its construction and describe.
Dimensions and Drawings
The dimensions of the structure must be calculated based on how many sections with bees you need. There can be any number, but the optimal number is 20. It should also be borne in mind that the height of the ceiling of the structure should be in human height. For the passage you need to leave 0.8 m of space - this will allow you to move freely, maintain the cassettes and set the honey separator on 4 frames.
The drawing of the mobile pavilion may be as follows:

General form:

Necessary materials and tools
To build a pavilion, you will need:
- metal beams;
- wooden bars;
- Chipboard or fiberboard;
- roofing material;
- nails, self-tapping screws, door and window hinges;
- paint;
- trailer;
- level;
- ruler-corner;
- tools for working with metal;
- jack.
Important! You need to think about the lighting in the pavilion in advance, because for it it is necessary to supply power from a stationary line or transformer or provide for the installation of an electric generator.
Step-by-step manufacturing
Getting to the manufacture of cassettes:
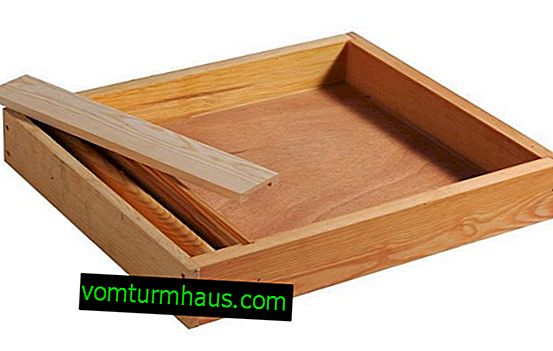
- Prepare a 20 mm timber and fiberboard sheets.
- From the fiberboard sheet, cut two rectangles 30 cm wide and 29.5 cm high. These will be the ends of the future cassette.
- On these rectangles in the center, cut an isosceles triangle with a base of 22 cm and a height of 29.5 cm.
- From the remains of the fiberboard sheet, cut another 2 rectangles for the side walls 44.7 cm wide and 29.5 cm high.
- Cut the bar to fit the dimensions of the resulting rectangles. On each sheet there should be 2 pieces of timber, top and bottom (that is, the length of the timber should correspond to the width of the sheet).
- Using self-tapping screws, connect the sheets of the fiberboard and the boards so that the boards are attached along the edge of the fiberboard.
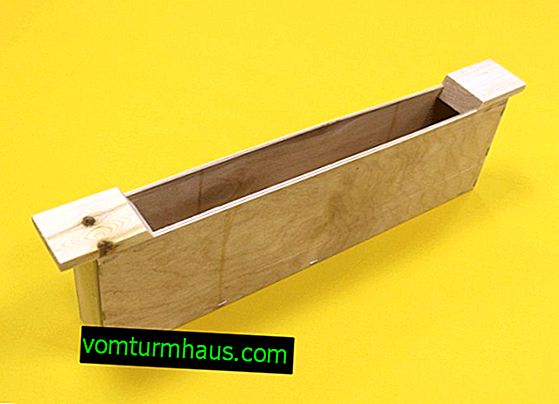
- Assemble the cassette from the resulting rectangles by connecting all the parts with screws (75 mm) so that the bars are on the outside of the structure.
In the finished structure, the length of the end side is 36 cm. This case is designed for 8 socket frames or 7 store frames.
Video: making cassettes for the pavilion
Arrangement
After construction, the finished pavilion must be equipped so that it would be comfortable for both bees and the beekeeper.
Compartments and feeders
The compartments in which the bees will inhabit can be installed in one direction or in two opposite directions. The compartment in which all the necessary equipment will be stored is equipped in any place convenient for the beekeeper. Feeders are necessary for feeding bees in the cold period and at a time when the collection of nectar is temporarily stopped. They are inside and outside.
The first are divided into such types:
- Ceiling - represent a box and are filled without opening the hive. Convenient for long-term feeding.
- Frame - look like a frame closed on the sides with plywood. They are located at the nest, suitable for autumn top dressing.
- Ceiling plastic with an inner glass are functional, but bees can penetrate the main compartment with food.
- From plastic bottles - the design resembles a drinking bowl with a dispenser. They are located at the bottom of the hive and are used only for one-time feeding.


Outdoor feeders:
- General - the capacity is located near the apiary. Effective if there are no other apiaries nearby.
- Mounted - hung on the flyer. They are convenient in that you do not need to open the hive to fill them, but they can also attract other insects.
Lighting and ventilation
Lighting is preferably done combined from fluorescent and incandescent lamps, which will be protected by a ceiling. This lighting option will avoid shadows and will not burn the bees. Arrangement of ventilation depends on how well the design of the pavilion allows air to pass through. But it is best to build additional ventilation, which, if necessary, can be drowned out.
Did you know? According to the results of various archaeological excavations, it was found that people started breeding domestic bees about 6000 years ago in Egypt.
To do this, on one side of the structure you need to put a wooden box with a net, and on the opposite wall, under the ceiling, make an outlet for a wooden pipe of the same diameter as the inlet. The pipe should rise 120 cm above the roof. Exhaust hatches are also required in the ceiling, and a window in the doors.
Beekeeper Camora
The size of the chamber for the beekeeper can be any, depending on his needs (what exactly needs to be stored in it). In the mobile version of the pavilion, it is better to place the chamber behind. Make it better cross-cutting, so that it is more convenient to pass through it. Shelving for tools, equipment and feed must be provided in it.

Warming
In order for the bees to comfortably winter in their house, it needs to be insulated. You can use roofing material laid between sheets of plywood. All joints and crevices must be covered with a film. Instead of roofing felt, you can use mineral wool.
If the winters are severe in your region, then you can provide for electric heating of the structure, making it automated so that it starts to work only when the temperature drops below a certain point. This will allow you to save energy and avoid strong cooling of the hives with a sharp decrease in temperature.
We recommend that you learn how to properly insulate the hive for the winter.
Features of keeping bees in pavilions
Recently, pavilion beekeeping has become increasingly popular in the world. In mobile designs, bees feel more comfortable, they spend less energy on maintaining the desired temperature, searching for food and more rationally consume it. The main thing with pavilion maintenance is the timely prevention of swarming.
To do this, insects must be constantly busy with work. At the same time, it is recommended that about 80% of the queens be replaced by young ones annually. With pavilion maintenance, it is necessary to carefully monitor the temperature inside the structure. For this, a ventilation system consisting of hatches and windows should work efficiently.

It is enough to carry out the following manipulations:
- to form a nest;
- insulate the side walls;
- check the ventilation;
- prepare food for the February feeding.
You will be interested to know about the life span of a bee.
The use of pavilions for bees allows not only to facilitate the care of them and make the apiary more compact, but also to increase the “productivity” of insects. The necessary design can be purchased at the store or made independently. The main thing is to correctly execute the drawing and calculate the amount of necessary materials on it.