How to grow orchids from seeds at home
Orchids enchant many people around the world with their beauty and aroma. Breeders who annually create new varieties and forms do not lose interest in them. You can get your own orchid by growing it from seeds. The intricacies of growing this flower in a seed way at home will be discussed in the article.
Short flower description
An orchid is rightly called an aristocrat among flowering plants, it is so elegant, graceful and unique. This flower is classified as a family of orchid or orchis, one of the oldest and most numerous on Earth. Today it is known that there are about 25 thousand natural species and 100 thousand artificially bred hybrids.
An orchid forms a rhizome with strongly developed lateral shoots and aerial roots. Stem height, size, shape and color of leaves and flowers depend on the species and variety. There are compact bushes up to 30 cm high and specimens with high growth - up to 1 m.
There are 2 types of inflorescences: a brush on the stem, consisting of several flowers, and a spikelet, located singly.
Flowers can reach diameters from a few millimeters to 25 cm. The color of the petals is white, pink, purple, lilac, yellow, black.
Among indoor orchids, by type of growth, 2 species are distinguished:
- Monopodial . Growing up. The leaves of the upper tier are always larger than the lower. Forms adnexal roots on the stem.
- Sympodial . Rhizome is horizontal. The flower grows in a bush with several branches. Has a pseudobulb or bulb, from which a flower arrow can form.
Among the most popular indoor species:
- phalaenopsis;

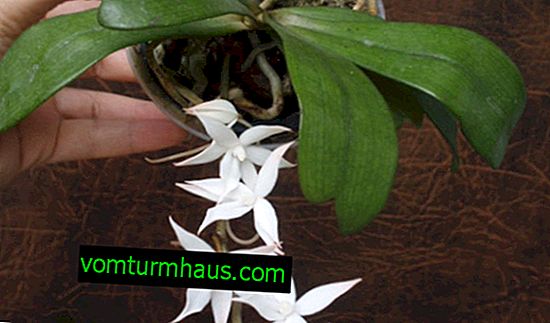
- airgis;
- Wanda

- Cattleya;

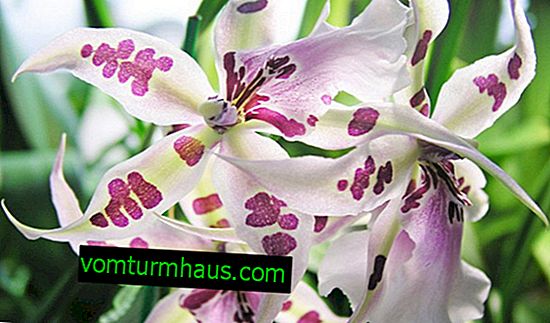
- Cumbria
- cymbidium;

- oncidium;

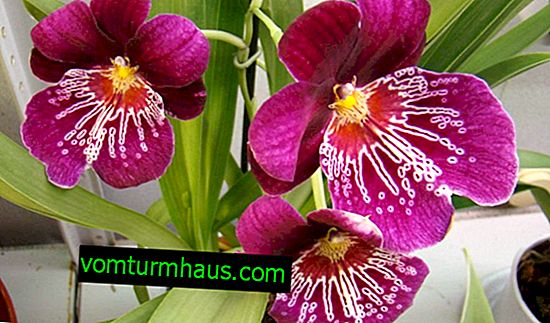
- miltonia.


Terms and optimal conditions for landing at home
Before turning to the coverage of the question of how to grow an orchid from seeds, we want to warn that this process is time-consuming and lengthy. The seeds of the flower are very small and light, similar to dust. They are difficult to assemble. They are formed in boxed fruits.
In the wild, not all sprout, but only those that have a mycelium. By the way, this was the reason why breeders could not use the seed method for orchid propagation for a long time.
Did you know? There are species of orchids that are not capable of photosynthesis. They settle on other cultures or stumps and feed on mushrooms located on the roots, which penetrate the organs of other plants, or aerial roots. Only in 1903, a French mycologist Noel Bernard made the discovery that seeds do not contain nutrients, and for their germination, infection with microscopic fungi is necessary. Applying this method, the Frenchman received the first seedlings of orchids.
Sowing seeds produced in the spring. For germination, you need a room where you can maintain the air temperature at +25 ... + 28 ° C, humidity 70% and daylight for 14 hours. Such conditions can be arranged in a mini-greenhouse or in a greenhouse.
Preliminary preparation
First you need to purchase seed, substrate and containers for germinating and picking seedlings, as well as to think about where to place the crops in order to provide them with the necessary conditions.
As a rule, today the main supplier of orchid seeds is China. Seeds are ordered online.
As flasks for germination, special flasks (sold in specialized stores) or glass jars with lockable lids are used. As a substrate - a gel-like nutrient agar-agar, a nutrient medium of Lewis Knudson.

The preparatory process consists of the following stages:
- Disinfect the containers for planting - boil, steam over an hour or calcine in the oven for half an hour at a temperature of +130 ... + 150 ° С.
- Pour 10-15 g of agar-agar with water, leaving until swelling.
- Boil 200 ml of distilled water.
- Add to it agar-agar, 10 g of glucose, 10 g of fructose, without stopping stirring.
- Wait for dissolution.
- Add dropwise a solution of potassium carbonate or potash, phosphoric acid, until the acidity level is at 4.8–5.2 pH (checked using litmus paper).
- Pour hot solution into flasks. The substrate should fill a third of the tank.
- Close the flasks with lids and place in a pressure cooker or pan with water for half an hour.
- Check containers and substrate for sterility, leaving them covered with cotton wool for 5 days.
- After this period, if mold has not formed, 10 minutes before planting, place the seed in a chlorine solution (10 g CaCl² / 100 ml water).
Important! Do not place seeds in the ground in which mold has formed. It is necessary to re-prepare a new substrate, observing sterility.
How to plant and grow seeds: a step-by-step guide
Planting of seed material is also carried out under sterile conditions:
- Place the flasks in a wire rack, which is placed above the boiling water tank.
- Take seeds with sterile tweezers and place in flasks.
- Shake flasks for even distribution of seed.
- Close with sterile caps.
- Place in prepared conditions.

Seedlings are transplanted into non-sterile soil after 12 months. Transparent plastic cups are suitable for picking. Sphagnum moss mixed with fern and pine roots in equal proportions is used as a substrate.
Also crushed activated carbon (10 tablets / 1 liter of substrate) is mixed into the substrate. Before planting, the soil mixture is poured with boiling water and incubated for 30 minutes. Then pour the mixture into containers.
A pick is produced as follows:
- The sprouts are pulled with forceps in a circular motion. You can also fill them with warm water and let the agar agar melt.
- Plant sprouts in a container with prepared substrate.
- Put in a warm place.
- Care of seedlings consists in regular spraying with warm, soft water. After six months, they can be transplanted into ordinary soil and a permanent pot.
Did you know? In the nectar of some species of orchids, for example coriantes, Swamp dwarf, there is a narcotic substance intoxicating insects. After landing on the bud, the animal may not be able to fly away for 40 minutes.
Transplanting seedlings into a pot
Orchid can be grown in containers made of ceramic or plastic. The size of the pot should be selected based on the length and width of the root system.
Soil for growing flowers is purchased at the store. It can also be done with your own hands. Its composition will depend on the type of flower grown.
We give several options for the manufacture of the substrate:
- Mix charcoal and pine bark in a ratio of 1: 5.
- Combine 5 parts of pine bark, 2 parts of sphagnum moss, 1 part of charcoal.
- Make a mixture of 3 parts humus, 1 part peat, 1 part charcoal, 1 part coniferous bark.

When transplanting seedlings to a permanent place, you must:
- Pour into the pot a layer of drainage from gravel or broken brick. It should occupy a quarter of the entire capacity.
- Sprinkle soil drainage.
- Place the sprout in the center of the container.
- Spread the roots evenly on the ground.
- Sprinkle the roots on all sides, adding soil to the top of the pot.
- Tamp the ground lightly with your hands.
- To water.
Plants grown from seeds, the first peduncles produced after 4-5 years.
Further flower care
Orchid is a moody flower. The maximum decorative effect can be achieved from those plants that grow with proper lighting, watering and a regular influx of fresh air. An orchid needs a 12-14 hour light day.
Daylight should be diffused. Sun rays are harmful to the plant. In the autumn-winter period, the installation of artificial lighting from fluorescent lamps will be required.
As for the best location in the apartment, window sills of eastern and western windows are perfect for orchids. When placed on the south windows you need a shade. The ability to grow on the northern windowsills will depend on the type of orchid. Most of them in such a place will die or will not bloom.

- temperature: +20 ... + 25 ° С in the summer, +16 ... + 18 ° С in the winter;
- humidity: 60–70%.
Important! The flowering of many species of orchids stops if the air temperature rises above + 25 ° C.
To maintain the required level of soil and air humidity, the plant needs to be regularly watered and sprayed. Water the flower sparingly, as the upper soil layer dries up, 2-3 times a week. In winter, the volume and frequency of humidification is reduced. It should be remembered that the orchid can endure short-term droughts, but even a short stagnation of water is destructive.
For irrigation use exclusively warm, settled, rain or filtered water. When spraying, you need to control that water does not fall on the flowers. If moisture is in stable contact with the buds, then they will fall faster and become covered with unaesthetic spots.
An important component of room care is fertilizer application. The orchid is fertilized during the growing season every 2-3 weeks. Apply universal fertilizer "Agricola", succinic acid.
Transplant an orchid only in case of emergency. She does not tolerate this procedure. Therefore, it is better to annually just update the upper soil layer. If transplantation is nevertheless necessary, it is carried out by transshipment without destroying the earthen coma.
How to deal with diseases and pests
Ignoring advice on creating the necessary conditions and conducting regular care measures leads to the fact that the plant begins to hurt and be affected by harmful insects. Fungal and bacterial infections can affect the orchid. Often with excessive watering and in cold temperatures, root rot develops.

- Pruning affected roots.
- Soaking healthy roots in a solution of potassium permanganate or any fungicide.
- Processing of cut points with activated or charcoal.
- Plant transplantation into a new substrate and a pot with the addition of granules "Gliokladina", "Trichodermin."
- Watering with “Alirin-B”, “Maxim” means in a dosage reduced in 2 times.
A flower can suffer from such parasites:
- Spider mite . Symptoms of infection - a spider web on the leaves and stalk, drying out and deformation of the leaves. Treatment consists in treatment with acaricides or insecticides: Fitoverm, Bi-58, Karate, Iskra-M, Actellik. A good effect is given by spraying the plant and putting a plastic bag on it for a couple of days.
- Mealybug . The parasite leaves a characteristic symptom - white loose discharge, similar to cotton wool. They fight it with soap wipes, sprinkles with a solution of green soap, infusions of tobacco, garlic, a decoction of cyclamen, tincture of calendula, alcohol, drugs "Aktara", "Biotlin", "Calypso", "Confidor", "Fitoverm".
- Shield . This is a small insect covered with a hard shell. It feeds on the flower juices. The first symptoms of the appearance of the scale are sticky fluid on the trunk. Destroy it mechanically - scraping with a brush. Acetic wipes are also effective, rubbing with tincture of garlic, red pepper. In case of severe infection, they resort to chemical treatment using Fitoverm, Actellik, Metafos.
- Thrips . The fact that these parasites chose the plant is indicated by small holes in the leaves, brown spots, deformation of the stems. Their reproduction is facilitated by dry air. They treat the flower by spraying with the insecticides Actellik, Inta-Vir, Fitoverm, Aktara and others.
- Aphids . This is a sucking parasite that feeds on the plant's juices, as a result of which it withers, its leaves turn yellow, curl and fall off. Rubbing flower organs with soapy water and spraying with the insecticides mentioned above help fight aphids.
- Whitefly The danger is not white moths, which can periodically be seen fluttering over the plant, but their larvae that feed on leaves. You can fight whitefly with herbal decoctions and infusions, tobacco infusion. With severe infection, spraying with chemicals (the same as in the treatment of thrips) will be required.

- The leaves turned dark green . This change indicates a lack of light. You need to increase the duration of daylight hours or rearrange the pot in a brighter place.
- The leaves turned yellow, with brown spots . This indicates an excess of light, exposure to direct sunlight and the occurrence of burns. It is necessary to correct the illumination of the flower by shading it or moving it to another window sill.
- A brown border appeared at the edges of the leaves . So the plant reacts to growth in a too dry room. The problem can be fixed by installing a humidifier or regularly spraying the flower.
- Flower stalks, buds are drying out. The reason lies in excessive watering. It is necessary to establish the recommended mode of hydration.
- Missing flowering . This problem can provoke many factors. Most often this is due to insufficient lighting.
- Dropped leaves . It is likely that the plant receives too much moisture or has contracted a fungal disease. It is necessary to allow the soil to dry, reduce the number of irrigations and treat with the fungicide allowed for indoor plants.
So, now you know how to grow an orchid from seeds, and you can try to do it yourself. By planting this plant in your home and providing it with proper care, you will receive a wonderful decoration of the interior, and you can enjoy a long and lush flowering.


