How to and when to transplant indoor plants?
Indoor plants are grown today in every apartment and house, decorate offices and administrative institutions. In order for the flowers to please their healthy appearance as long as possible, you need to provide them with quality care.
Why transplant indoor plants?
Each plant has features in the maintenance and care, but the procedure for periodic transplantation is common, the need for which arises for a number of reasons:
- When buying - relevant for imports from abroad. Typically, plants are transported in a substrate designed specifically for transportation. It maintains a special microclimate (temperature and humidity). When watering or fertilizing, changes occur that are harmful to the plant. In this case, they need a more suitable soil.
- As it grows, the root system grows along with the flower, it becomes crowded in the old capacity.
- Due to illness - with partial rotting of the roots, the plant can be saved by removing damaged parts and moving it to clean soil and another pot.
- Due to contamination of the soil - fungi or insects can develop in it.
Did you know? The first English-language book, The Garden of Edem, on indoor floriculture was published in 1653.
When is the best time to do this?
Not all plants develop in the same way, so for some the procedure is recommended in the fall, and for others in the spring. A general rule for all specimens is considered to be a transplant before active growth begins. It is unacceptable to transplant before the period of rest and during it.

Type of transplant
Transplantation methods depend on the type of root system of the plant. With weak roots, you need to be careful not to damage them and not provoke infection. Therefore, many species are transplanted with the remains of old soil. Depending on this, the procedure is divided into methods:
- full - the previous substrate changes completely, shakes off the roots;
- incomplete - part of the earthen coma remains;
- partial - only part of the substrate changes.

Soil used
The origin of the plant, the conditions of the natural environment of growth dictate the need to use a suitable type of soil mixture. In addition, take into account the state of the root system:
- specimens with weak and thin roots need light and loose earth. A leaf or sod layer of soil with decayed plant debris is suitable for them. For better water and air permeability, coarse sand (ferns) is added to them;
- fast-growing species with more developed roots prepare a substrate consisting of equal parts of a layer of turf and leafy land with the addition of manure (pelargonium, fuchsia);
- fleshy and strong roots tolerate clay garden soil with the addition of sand (palm trees).

Capacity selection
The general rule when choosing a container: for each procedure, take a pot slightly larger than the previous one, depending on the ability to grow the transplanted specimen. The shape of the pot depends on the type of root system:
- growing deeper - deep, possibly conical;
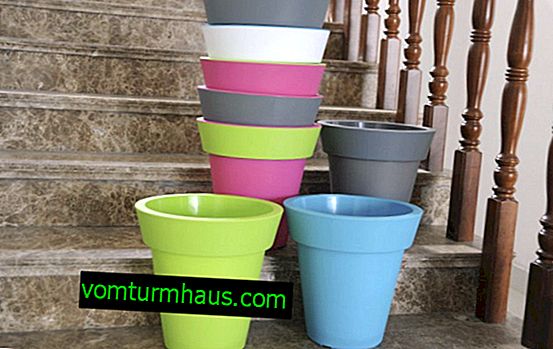
- growing in breadth - emphasis on diameter, round or square shape with a wide bottom.


- plastic - lightweight, with existing holes, easy to clean;
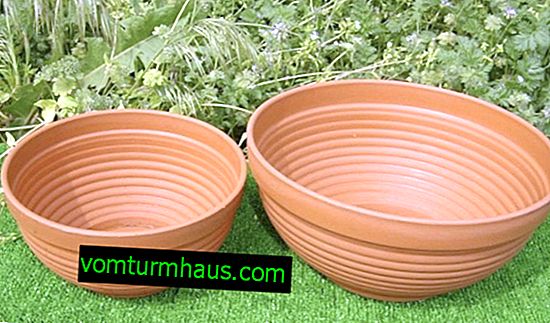
- ceramics and clay - it passes air and moisture well, is stable;
- glass (aquarium) is ideal for a mini garden, but not for plants on the windowsill or floor.
Important! Unsuitable materials are stone and metal. The first is too heavy and inconvenient to care for. The second is corroded, short-lived. Both materials also quickly heat up, which is fraught with root diseases.
Technology
Transplantation is a responsible matter: the life of the plant depends on how correctly the process is carried out. The technology of the procedure involves several stages. More about them.
Preparatory work
The key to success of the entire procedure is disinfected soil and capacity. The soil is calcined in the oven or heated in a water bath. The pot is washed well, treated with a weak solution of potassium permanganate. Drainage is laid at the bottom:
- gravel;
- expanded clay;
- shards of brick.

Transplant process
To make it easier to free the flower from the old tank, the day before the manipulation the earth is abundantly moistened. Further sequence of actions:
- The flower is carefully removed from the pot, tapping on its walls.
- If necessary, remove the old soil, carefully picking from the roots (in plants with branching buds, some of the shoots can be cut).
- At the bottom of the tank, a small amount of the prepared substrate is poured over the drainage.
- The flower is laid on the ground, keeping on weight, straighten the roots.
- Fill the soil, filling the entire tank evenly.
- The pot is periodically shaken so that the earth is evenly distributed.
- The root neck of a plant is usually left on the surface.
- The soil is compacted.

Follow-up care
After transplanting, the plant must adapt. To do this, put a flowerpot in a place with diffused lighting. The first 3-5 days (depending on the type) do not water the flower. Then carry out irrigation with warm, settled water.
Some flowers may need top dressing. It is carried out 3-4 weeks after transplantation. The dosage is halved from the usual rate.

- manure
- chicken droppings;
- wood ash;
- yeast.
Read more about how to plant indoor flowers in a pot.
Useful Tips
A novice grower needs to know not only how to transplant an indoor flower. The following knowledge will come in handy:
- After purchase, the plant is given 2 weeks to adapt to a new place. If the dormant period is close, it is better to wait with a transplant until spring.
- Too large plants are easier to make a partial replacement of the soil (subject to the safety of the old).
- Coconut or horse peat soils will help to contain the growth of fast-growing plants and reduce the number of transplants.
- For the prevention of root rot, pieces of charcoal are mixed into the soil.
- To saturate the roots with oxygen, crushed pine bark is added to the soil.
- You can learn about the complete drying of an earthen coma in a pot by tapping on its walls. A muffled sound speaks of moisture, subtle and sonorous about the dryness of the earth.
- To soften hard water for irrigation, potash is added to it.

Possible mistakes
Inadvertence and excessive care lead to a mistake in transplanting indoor flowers. Common mistakes and their consequences:
- too deep landing - can rot roots;
- procedure at rest - the plant may die;
- during flowering - buds will fall;
- lack of disinfection of soil and containers - is fraught with diseases;
- improperly selected soil - deficiency or excess moisture, disease;
- cramped pot - slow growth;
- damage to the roots - infection, death.


