Horned violet: growing from seeds in the open ground
Horned violet is little known to non-specialists in the field of cultivation of decorative flowers, but is popular with flower growers all over the world - this is proved by the abundance of varieties of this variety. In this review you will find information on how to grow and care for horned violets.
Botanical description of the plant
Plant classification:
- name: Horned Violet (Ví́ola cornuta);
- type: grassy perennial;
- natural distribution range: Pyrenees;
- family: Violaceae;
- plant height: 15–20 cm;
- flowering time: from April to June.
The plant has a fibrous, fibrous root system with a depth of 15–20 cm. The main shoot is upright. The creeping form of the stem contributes to the rapid spread to unoccupied areas.

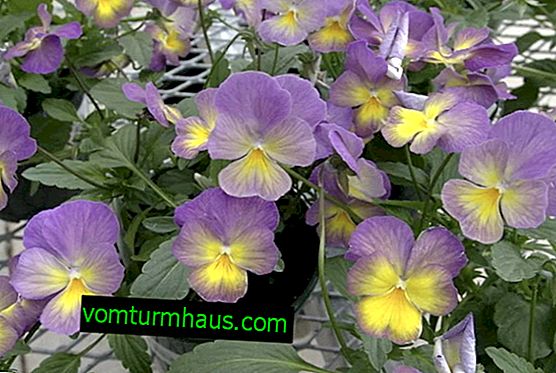
The main feature of the horned violet is the shape of the flower: the back side of the bud bends and resembles a horn in shape, which is what the name defines. After flowering, a seed box is formed.
Important! Harvested seeds retain the ability to germinate for 2 years. In the landscape design, the horned violet is used to decorate the boundaries of the plots and compose natural flower beds. The main requirements for the landing site are: good lighting and lack of soil moisture.
Varieties
Decorative properties made the flower very popular among breeders, therefore, in order to navigate the variety variety, you can choose varieties from the catalogs of companies that are engaged in selection, or by the names of varieties.

The breeder identifies a number of basic varietal characteristics for the entire series:
- all varietal seeds germinate simultaneously;
- flowers bloom evenly and massively throughout the season;
- excellent branching of the stem provides a large number of flowers;
- All varieties are distinguished by intensive coloring and can harmoniously complement each other in the compiled exposition.
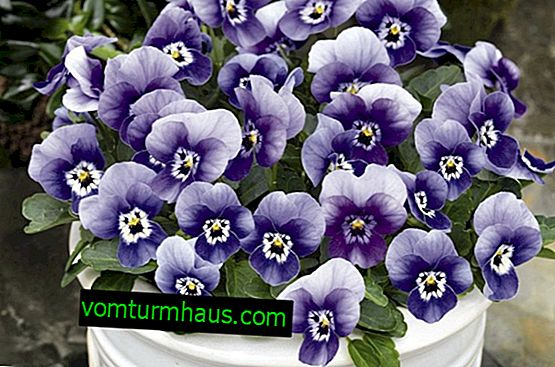
- Blue Moon with creamy white flowers, slightly complemented by a blue tint, and with bright yellow eyes.

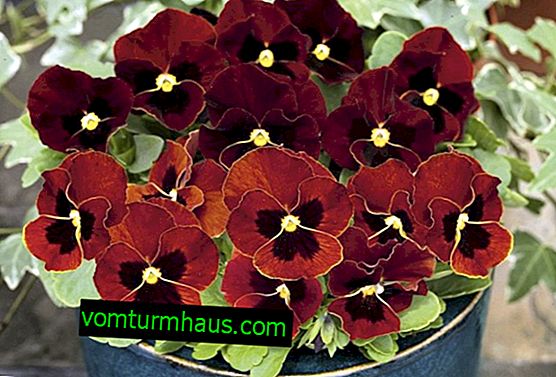
- Midnight - deep, dark, rich purple petals turning into red near bright yellow eyes.
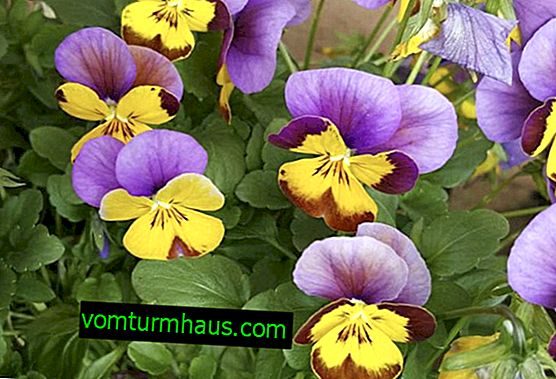
- Aurora borealis - bright purple flowers with yellow and orange spots.
- Starry night - the owner of purple violet petals with a yellow center.
- Twilight is represented by flowers of a saturated dark shade with gold.


Read more about growing violets on a windowsill.
Violets are not only painted in the colors of the rainbow. Black Molly Sanderson is also a hybrid of horned violets, and this is not the only variety with black flowers. In addition to it, varieties are very popular:
- Black magic;
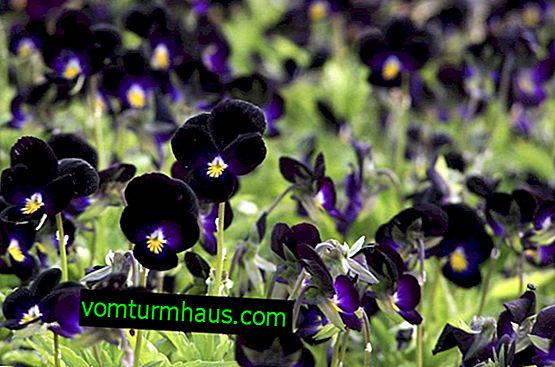
- Blackout
- Highland Black.


- Viola horned Johnny, bred by domestic breeders relatively recently. It blooms with small flowers of a classic purple color from May to late autumn. Distinctive features of the variety is that 1 bush is able to create more than 60 flowers during the season.
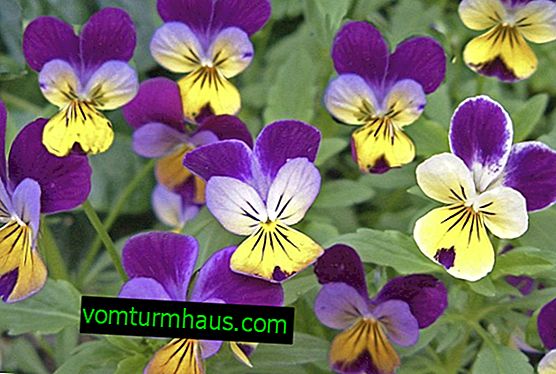
- Gorgeous flowers of the variety Gzhel patterns of the same brand will be a wonderful decoration for any flower bed. Large flowers resemble a butterfly in shape. The blue border of the petal sets off a white flower with a dark middle. The variety blooms until late autumn.
- The Dolly variety belongs to small-flowered. It is characterized by a long flowering period and excellent frost resistance.


Seat selection
Most conditions are acceptable for violets, but it can only flourish in a sunny area, or partially shaded. In addition, the summer sun has a detrimental effect on flowers, so use areas with "spotty" light.
The soil should be moist, rich in nutrients, well-drained and fertilized with compost. Organic fertilizers are essential for plants to be strong and healthy.
Seed cultivation
You can sow violet seeds directly in the open ground, but most often the plant is grown by seedling, because of its greater reliability. To make the horned violets bloom this year, start growing from the end of February. Before sowing, stock up with a good soil substrate and treat the seeds with a growth stimulator.
Sowing seeds for seedlings
Depending on the variety, seeds can be removed from mature seed bolls in spring or fall. To do this, you need:
- remove seeds from capsules;
- let them dry;
- Store in a dry paper bag until planted on a flower bed or in pots.

Important! Before sowing, grate the grains with fine dry sand to remove the oil layer. This facilitates the germination process. Soaking seeds in the stimulator lasts about 20 hours. The stimulant helps the plant grow and bloom better.
Since the natural habitat of violets is mountains, the root system is located at the surface of the soil, so the plant needs a loose nutritious soil. You can buy special soil for violets or mix compost, coniferous earth and perlite in equal parts. Organics will provide plants with nutrients, and perlite will give the soil the necessary airiness.

- Stir the soil thoroughly.
- Take the germination container and lay the drainage on the bottom.
- Fill it with смесь soil mixture and moisten it with warm water.
- Distribute the seeds. If cups are used, then 2-3 seeds must be put in each.
- Cover them with moist soil, a layer of 1-2 cm for germination.
- Provide indoor temperature + 18 ° С ... + 21 ° С.
- Maintain a constant soil moisture during the germination period (10-14 days).
- Once the seeds have sprouted, move them to a sunny window.

Start "accustoming" seedlings to the microclimate on the street from 1-2 hours a day, gradually increasing the time to 4 hours. On the first day, set the plants in the shade, then move them sequentially daily to a more sunny area. Observe the condition of the seedlings. If they are cold - you will immediately notice it on the drooping leaves. Keep the soil moist, as the street wind dries it very much. After 10-14 days of hardening, plant the seedlings in a permanent place in the garden or in hanging baskets.
Important! Before planting in the soil, take an interest in the weather forecast. Violets can endure a little frost, but they will not survive the snow that has fallen.
Sowing seeds in open ground
If the weather permits, you can sow violets directly in the garden. To plant them, you must:
- Measure soil acidity. For violets, this indicator should be 6.5–7.2 pH.
- Dig a bed while composting. Stir it thoroughly with soil to a depth of 10 cm. If the soil is clay, add sand or coniferous soil to increase looseness.
- Water the future flowerbed.
- Sprinkle the seeds and cover them with a layer of moist soil. The distance between the seeds should be at least 10-15 cm between them.

In some areas, seeds are introduced into the soil in the fall so that they spring naturally in the spring. If you intend to create a natural alpine hill in a region with a warm winter (with a temperature not lower than 0 ° C), then it is better to introduce seeds in the autumn.
Care Tips
Growing violets will require maintaining a constant soil moisture. Their root system reaches a depth of no more than 20 cm, and a lack of moisture in this layer will have a detrimental effect on the plant. Adult violets can get enough moisture from summer rain, but it's better to control the humidity yourself. It is also imperative to remove weeds - they can drown out your flowers. Additionally, superphosphate is fed monthly.
Did you know? The ancient Romans adored violets and grew them in huge quantities. This gave an occasion to the ancient Roman writer-encyclopedist Pliny to write that it would be better for the Romans to grow olive trees than senseless violets.
Watering
In carrying out irrigation, it is worth focusing not on the specific number of days between irrigation, but on the condition of the soil. If it has dried to a depth of 3 cm - then the time has come to water. Drip irrigation of a flower bed is the best form of watering. Spray irrigation is also possible.

If the soil does not dry out between watering, root rot may develop. Plants in containers or baskets should be protected from hypothermia. Therefore, they are watered with warm water (+ 30 ° C).
Top dressing
Organic fertilizer is applied to the topsoil to a depth of 10 cm during planting. It can be compost or store fertilizer for violets. Its composition: nitrogen, phosphorus and potassium in equal shares or with a 2 times increased dose of phosphorus. You will need to use approximately 1 tsp. fertilizers per 1 square. m square. One week after planting, you can repeat the fertilizer application. Violets are perennials, so the operation is repeated annually, in autumn and spring.
From spring, and throughout the growing season, apply balanced water-soluble fertilizer from nitrogen, phosphorus and potassium once a month. For a thick flower bed, apply dry fertilizer by digging it into the soil. If you use water-soluble fertilizers, do not let the solution get on the leaves.
Weeding and loosening the soil
Use a shovel or a special digging fork to loosen the soil around the plants, especially if the flowerbed has been around for a long time. Start digging from the outer edge of the flower bed towards the center - so that around each violet the soil is treated in a zone of 30 cm.

Pruning
To ensure good flowering, you need to regularly remove faded flowers - this allows you to quickly form new ones. Violets can also be pruned if the plants become too long in the middle of the season. Otherwise, this plant does not need pruning.
Did you know? The famous German poet Johann Goethe had a habit of scattering violet seeds during a walk. These flowers still adorn the surroundings of Weimar and are called Goethe's Violets.
Shelter for the winter
Most varieties of violets are frost-resistant - in the mild winter they are able to continue flowering in the flowerbed. But those that grow in pots and containers need to be protected. As soon as the temperature drops below zero, the leaf part will die, and the roots will sprout in spring with new flowers. Cover the plants when the temperature is set (+ 2 ° С ... 0 ° С).

- Cover the topsoil with foliage, needles or straw.
- For potted plants it would be nice to cover the pots with foam lids.
- Wrap the pots with fleece or foil.
- Install them on polystyrene boards.
Landing rejuvenation
Perennial flower beds are usually highly leached due to annual flowering. To restore the fertility of the soil, you need to make fertilizers. In addition, the old flowerbed loses its visual appeal due to the fact that some areas are exposed, while others are heavily overgrown.
To update the flower beds:
- remove old roots and weeds with a garden fork;
- make compost or humus;
- add sand to improve soil breathability.

Breeding
Most gardeners buy violets twice during the season, but this is not necessary. These plants can be grown independently in several ways. They multiply:
- seeds;
- cuttings;
- layering;
- dividing the bush.
Dividing the bush
Separation of plants involves the separation of the crown and root ball into several parts. Most perennials reproduce this way. To do this, you need to carefully divide the root ball with a knife. It’s good if the roots can be spread apart. Violets blooming in spring are divided in the fall and planted in a new place, having previously prepared a place for planting.

- Dig a bush of violets with roots.
- Gently split the root ball with a knife or hands, loosening it from top to bottom. Create in this way the required number of parts.
- Once part of the soil has crumbled, inspect the roots and remove old or damaged by the disease.
Layering
Layers are called overhead shoots of a plant. Since the stem of the violet is creeping, you can:
- Pick up a pot not too big.
- Put drainage at the bottom and fill it with soil.
- Moisten the soil.
- Take one of the stalks of the violet and, without tearing it from the main plant, lay it on moist soil, pressing it with a hairpin or staple.
- Sprinkle with soil and moisten.
- When the shoot takes root, it can be separated from the main plant and already grown as a new plant.
Cuttings
Some varieties of violets do not form seeds, so they are propagated by cuttings. A stem is called a part of the shoot - for example, an unrooted leaf.

- Cut the stalk with a few leaves.
- Put it in a prepared container with soil.
- Pour the planted stalk.
- Cover the pot with a film so as not to touch the leaves.
- Choose a cool place with bright lighting and set the pot there.
- Keep the soil in the pot moist.
- If a new plant appears, it means that the rooting was successful and the film can be removed.
So, caring for a horned violet is no more difficult than caring for other varieties of this flower. Propagate the available violets in a convenient way, do not forget about proper watering and timely fertilizing - and your flower beds will certainly thank you with abundant flowering.


